Sanity | October 17, 2024 | 6 min read
Creating a Blog using Next.js and Sanity.io
Discover how to easily connect Sanity.io to Next.js and build a dynamic, fast blog. From setup to fetching and displaying content, we’ll guide you through creating a sleek, content-rich site in no time!

In this blog we will be going over how to use and connect Sanity.io to a Next.js project to create a fully functional blog. Where Sanity handles the content management and Next.js will take care of the frontend and rendering.
Why Next.js and Sanity?
While Sanity.io is a cloud-based headless CMS that lets us manage and structure our content and Next.js is a great framework that utilizes React, enabling the ability to use Server-Side Rendering (SSR) and static site generation (SSG). Combining both of them allow us to provide a seamless solution for building content-rich websites, utilizing block content that is both fast and scalable
In our last blog, we covered how to set up a Sanity project. If you missed it, you can check it out here: Creating a Blog with Sanity.io.
Step 1: Setting up a Next.js Project
We will begin with creating our Next.js projecting using the command:
npx create-next-app@latest {project-name}Change to your projects directory
cd {project-name}Step 2: Install Sanity Client in Next.js
Now we will install the @sanity/client npm package, this will allow use to connect to our Sanity project.
npm install @sanity/clientStep 3: Connect to Sanity in Next.js
Create a sanity.js file and configure your connection with Sanity and your project. Here is the code to do so:
import { createClient } from '@sanity/client'

export const sanityClient = createClient({
  dataset: process.env.NEXT_PUBLIC_SANITY_DATASET || "production",
  projectId: process.env.NEXT_PUBLIC_SANITY_PROJECT_ID || process.env.SANITY_PROJECT_ID,
  apiVersion: "2024-01-01",
  useCdn: true,
})
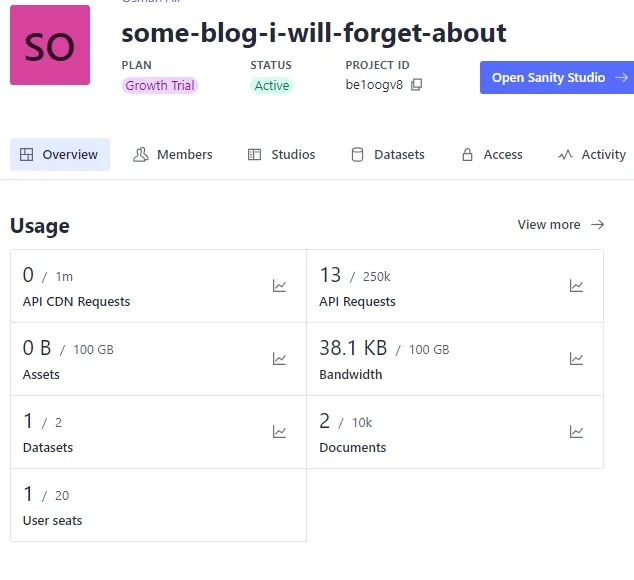
For process.env.NEXT_PUBLIC_SANITY_PROJECT_ID and process.env.NEXT_PUBLIC_SANITY_DATASET we will pull that from our environment variables but first we will have to create them, and to that we will need an .env.local file to hold our project id locally. To that we need to create the file in the root directory and have it contain you project id which can be find in your Sanity dashboard

Here is what your .env.local file should look like:
NEXT_PUBLIC_SANITY_PROJECT_ID=be1oogv8Step 4: Fetching Blog Posts from Sanity
Next, we will pull in blog post from Sanity. We will be doing all of this in our index.js file and we will use getStaticProps to get our data.
import { sanityClient } from '../sanity'
import Image from "next/image";
import Link from "next/link";

export async function getStaticProps() {
  const query = `*[_type == "blog"]{
    title,
    description,
    slug,
    mainImage {
      asset -> {
        url
      }
    }
  }`
  const blogs = await sanityClient.fetch(query)

  return {
    props: {
      blogs,
    },
  }
}

export default function Home({blogs}) {
  return <></>;
}
This code queries for all of our blogs from Sanity, specifically fetching the title, description, slug and main image of each post. Now we will need to render this data.
Step 5: Render data in Next.js
We will be adding to the index.js file, in the Home function. I will be using Tailwind to style the page but feel free to style however you would like to.
export default function Home({ blogs }) {
  return (
    <div>
      <ul className="grid grid-cols-1 lg:grid-cols-3 gap-4 lg:gap-6">
        {blogs.map((blog) => (
          <li className="border-2 rounded-lg" key={blog.slug.current}>
	          <Link href={blog.slug.current}>
		          <img src={blog.mainImage?.asset.url} alt={blog.title} className="aspect-video"/>
	            <h2 className="mt-2 text-xl font-medium">{blog.title}</h2>
	            <p className="font-light">{blog.description}</p>
            </Link>
          </li>
        ))}
      </ul>
    </div>
  )
}
Step 6: Create Dynamic Blog Pages with Slugs
Now we need to make the blog pages that will display all the content from a specific blog post. Start by creating a folder named blog in the pages directory then create a file [slug].js in the new blog directory
In [slug].js we will use getStaticPaths to generate the paths for each blog post and getStaticProps to fetch the individual blog data based on the slug
import { sanityClient } from '../../sanity'

export async function getStaticPaths() {
  const query = `*[_type == "blog"]{
    slug
  }`
  const blogs = await sanityClient.fetch(query)
  const paths = blogs.map((blog) => ({
    params: { slug: blog.slug.current },
  }))
  return { paths, fallback: false }
}

export async function getStaticProps({ params }) {
  const query = `*[_type == "blog" && slug.current == $slug][0]{
    title,
    description,
    blogText,
    mainImage {
      asset -> {
        url
      }
    }
  }`
  const blog = await sanityClient.fetch(query, { slug: params.slug })

  return { props: { blog } }
}

export default function BlogPost({ blog }) {
  return (
    <main className="flex justify-center">
	    <section>
	      <h1>{blog.title}</h1>
	      <img src={blog.mainImage?.asset.url} alt={blog.title} />
	      <p>{blog.description}</p>
	      <div>
	        {blog.blogText}
	      </div>
      </section>
    </main>
  )
}